avatar


接入ChatGPT的方案

部署方法

基于开源项目:ChatGPT-Next-Web
Github地址:https://github.com/Yidadaa/ChatGPT-Next-Web
部署方法参考ChatGPT-Next-Web的官方介绍即可。
如果利用Vercel进行部署的话,需要注意,因为Vercel的默认域名会不定期的遭受DNS污染,根据ChatGPT-Next-Web官方的说法,绑定自己的独立域名,能获得更好的体验。

和博客进行整合

整体整合思路,和《一些关于游戏整合的例子:一些关于游戏整合的方案》中牧场物语、口袋妖怪等游戏的整合思路类似,利用iframe标签。
在具体实现上,采用了"pug"的方式。

关于"pug"的语法,可以参考:https://pugjs.org/zh-cn/api/getting-started.html

99800.pug

1
2
3
4
5
6
7
8
9
10
11
12
13
14
15
16
17
18
19
doctype html
html(lang=config.language data-theme=theme.display_mode)
head
include includes/head.pug
body
if theme.fireworks && theme.fireworks.enable
canvas.fireworks

include includes/mobile-sidebar/index.pug

nav#nav.chatgpt-99800
include includes/header/header.pug
iframe(src="https://chatgpt.kakawanyifan.com" frameborder="0" style="position: absolute;top: 8%;width: 100%;height: 92%;margin: 0 0;")
include includes/rightside.pug
include includes/search/index.pug
each item in theme.CDN_USE.js
script(src=url_for(item))
script(src='/js/99800.js')
include includes/additional-js.pug

99800.styl

1
2
3
4
5
6
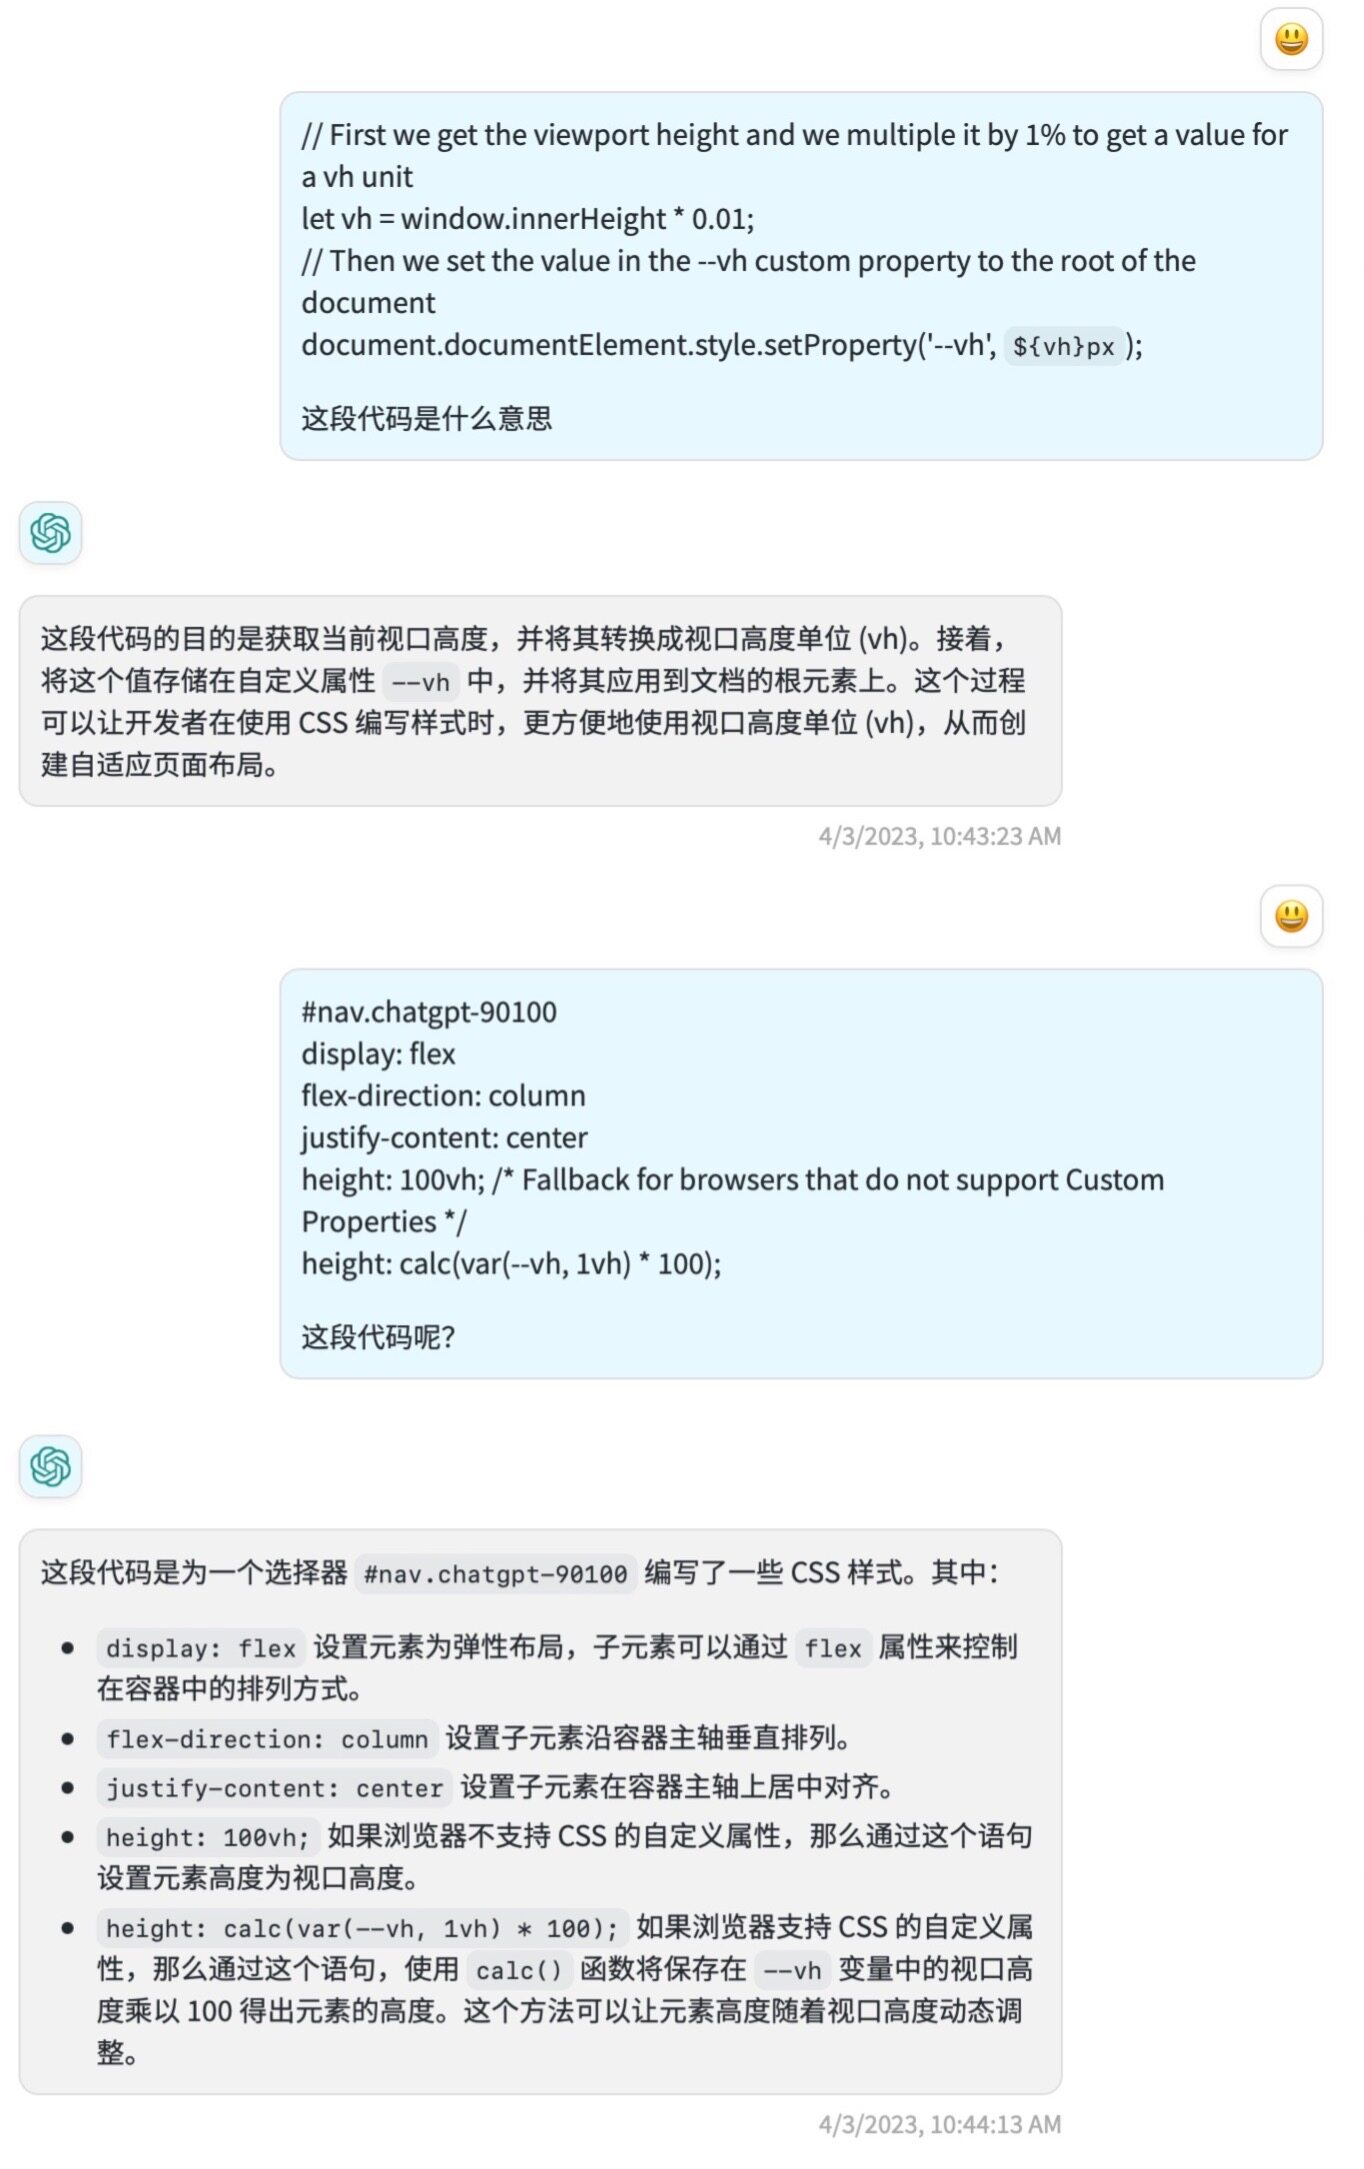
#nav.chatgpt-99800
display: flex
flex-direction: column
justify-content: center
height: 100vh; /* Fallback for browsers that do not support Custom Properties */
height: calc(var(--vh, 1vh) * 100);

/js/99800.js

1
2
3
4
5
6
// First we get the viewport height and we multiple it by 1% to get a value for a vh unit
let vh = window.innerHeight * 0.01;
// Then we set the value in the --vh custom property to the root of the document
document.documentElement.style.setProperty('--vh', `${vh}px`);

document.getElementById('rightside').setAttribute("style","display:none");

/events/99800.js

1
2
3
4
5
6
7
hexo.extend.generator.register('99800', function(locals){
return {
path: '99800/index.html',
data: locals.posts,
layout: ['99800']
}
});
1
iframe(src="https://chatgpt.kakawanyifan.com" frameborder="0" style="position: absolute;top: 8%;width: 100%;height: 92%;margin: 0 0;")

99800.pug的iframe标签中,设置style="position: absolute;top: 8%;width: 100%;height: 92%;margin: 0 0;"

  • position: absolute;:将元素的位置设置为绝对位置,即该元素相对于其父元素定位为绝对位置。
  • top: 8%,设置元素顶部与父元素顶部的距离。
  • height: 92%,设置元素的高度。

这么设计的原因是,希望topheight加起来等于100%,而top: 8%,是为了给博客的菜单栏预留位置。

height: 100vh;设置为100vh的原因是希望网页能恰好充满屏幕的高,不多也不少,这样就避免了一个网页出现两个滚动条,网页一个,网页内部的iframe窗体又有一个。
height: 100vh;设置为100vh,这样网页就没有滚动条,只有iframe窗体有滚动条。
但是,在实际测试中,发现在移动设备中存在问题,在移动设备中height: 100vh;指的是整个屏幕的高度,而移动设备的浏览器的顶部和底部都有各种功能菜单的,会占据高度。
所以采取JS进行计算,自适应判断。

代码解释如下

代码解释

开源贡献

正如上文所述,ChatGPT-Next-Web,是一个开源项目。我提交了如下的pull request

开源贡献-1

修改了/app/locales/cn.ts/app/locales/tw.ts部分的一些文字描述信息。

开源贡献-2

修改了/app/components/markdown.tsxfunction Markdown方法,添加了linkTarget={'_blank'}

关于ReactMarkdown的一些参数配置等,可以参考:https://github.com/remarkjs/react-markdown

1
2
3
4
5
6
7
8
9
10
11
12
13
14
15
16
17
18
19
20
21
22
23
export function Markdown(props: { content: string }) {
return (
<ReactMarkdown
remarkPlugins={[RemarkMath, RemarkGfm, RemarkBreaks]}
rehypePlugins={[
RehypeKatex,
[
RehypeHighlight,
{
detect: false,
ignoreMissing: true,
},
],
]}
components={{
pre: PreCode,
}}
linkTarget={'_blank'}
>
{props.content}
</ReactMarkdown>
);
}

个性化修改

在和博客整合后,出于UI设计等因素的考虑,对ChatGPT-Next-Web,进行了简单的修改,在这里做个记录。

删除home.tsx中的

1
2
3
4
5
6
7
8
9
<div className={styles["sidebar-header"]}>
<div className={styles["sidebar-title"]}>ChatGPT Next</div>
<div className={styles["sidebar-sub-title"]}>
Build your own AI assistant.
</div>
<div className={styles["sidebar-logo"]}>
<ChatGptIcon />
</div>
</div>

修改如下代码中实际读取的GithubIconREPO_URL

1
2
3
4
5
<div className={styles["sidebar-action"]}>
<a href={REPO_URL} target="_blank">
<IconButton icon={<GithubIcon />} shadow />
</a>
</div>

修改了app/locales/index.ts中的getLanguage()方法,不根据浏览器初始化ChatGPT-Next-Web的语言,固定为中文,除非用户进行配置指定。

1
2
3
4
5
6
7
8
9
function getLanguage() {
try {
// return navigator.language.toLowerCase();
// 不根据浏览器,默认就是中文
return "cn";
} catch {
return "cn";
}
}

修改app/components/chat.module.scss.prompt-toast,添加如下的代码。不显示前置条数。

1
display: none;

其他个性化修改还有:

  • 修改/app/locales/cn.ts中的一些文字信息。
  • /app/components/settings.tsx/app/components/settings.module.scss中进行了修改,包括去除某些设置项、调整设置项的位置、修改某些设置项的描述信息、增加更新日期等。
文章作者: Kaka Wan Yifan
文章链接: https://kakawanyifan.com/99801
版权声明: 本博客所有文章版权为文章作者所有,未经书面许可,任何机构和个人不得以任何形式转载、摘编或复制。

评论区